Articles

How to Make Soap in a Blender

Making soap in a blender is fun and easy.  It is quicker than standard cold process or hot process soapmaking and has some advantages as well as one limitation.

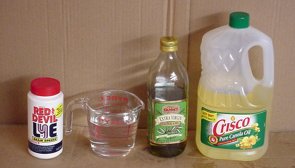
Before you begin you will need to decide on a soap recipe. Check our free soap recipes listed to the right.  I would suggest using a formula that includes some Palm oil and/or Coconut oil. These two oils are essential if you want a hard bar of soap that lathers well.  They also create a fairly quick trace time. It is recommended that you run whatever recipe you select through a lye calculator like our Soap-Calc or one of the free online SAP calculators. By doing this you can be sure that you will be using the proper amount of lye.  Also,  you can adjust the lye content to leave excess fat in your soap. A bar with more excess fat (over 5%) will moisturize your skin better.  Bars with less than 5% excess fat will leave you feeling cleaner. A lot of this depends on your skin type.  It is nice to be able to alter this characteristic with just a slight lye adjustment.

Making Soap in a Blender

The only limitation in making soap in a blender is that it does not allow for big batches of soap.  16 ounces is about the limit.  However, it has four nice advantages:

1) Blending your soap mix creates a much shorter trace time.  Instead of 15 – 40 minutes, it might require only minutes or even seconds depending on what type of oils you use.  This means you can mix and pour a batch in much less time.  It also eliminates all the stirring that must be done with cold process methods.

2) Since liquid fat and oils can be used at room temperature, there is no need for a thermometer.  If you have some solid fats like lard simply heat them until they are melted and add to the blender.  This means that in many cases you do not need to use a stove to heat the oils.

3) The blending process effectively whips the lye and water into the oil and fats producing a much smoother mixture. This lowers the chances of your mix separating.  This lowers the number of bad batches.

4. Your soap bars will be creamier in consistency and will even float due to the air that is whipped into the solution.  The final product is smoother and higher in quality.

(Use small one-pound batches only).

Step One – Dissolve the lye in cold water and wait until the solution cools and the mixture turns clear. At this point the lye is ready to begin converting oil to soap.  It is also very caustic so make sure you are wearing goggles and gloves when handling lye. Never pour water into lye. Only pour lye INTO water.

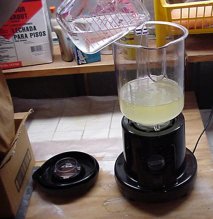
Step Two – Carefully pour the oil into the blender.  Then carefully pour the lye/water solution into the blender. The blender will of course be OFF when you are doing this.  Be careful not to splash or spill the lye solution on yourself or others. Make sure you are wearing goggles and gloves.


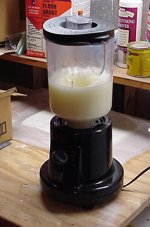
Step Three – Lock the blender in position, secure the cover and place a towel over the top of the blender for safety.  Begin blending at the lowest possible speed.  Again, make sure to wear goggles when you process the soap mixture and make sure the towel is in place to avoid any accidental splashing of the lye/oil mixture.  If you do this there will be almost no chance of any accidents.

Stop the blender and check the soap often to watch for what is called a thin-trace stage. This is point at which the soap mixture begins to thicken. If you were to take a spoonful and drizzle it over the mixture it would make a trace on the surface.  Each time you stop the blender, wait a few seconds before removing the cover.  When you remove the cover keep the towel between you and the blender just in case some soap splashes. Sometimes the soap “burps” when it stops as trapped air comes to the top. At the thin trace stage, stop the blender and stir the soap to check for tracing and to allow bubbles to escape.  At this point you are trying to avoid letting the soap get too thick.  If it hardens in the blender that can cause issues.

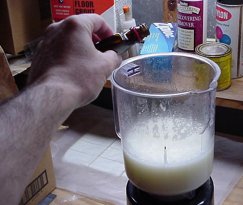
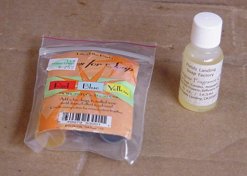
Step Four – At this point you can add any essential oils,colorants or fragrances as well as any other ingredients such as oatmeal or herbs.  You add them at this point because the lye has done most of its work and will not affect the extra ingredients as much.  Blend these in for a few seconds and then stop the blender.

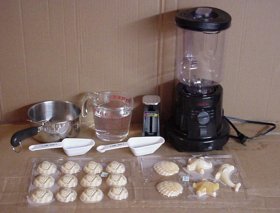
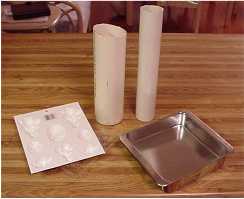
Step Five – Carefully pour the soap into individual molds or one mold. Cover it with a blanket for insulation. Larger molds work well because the soap stays together and keeps itself warm.  Cooling too fast can alter the curing process and ruin a batch. A warm, dry room is best. Let the soap set for a day or two and then after popping it out of the molds cut it and let it age for at least three weeks.

At this point your soap should be ready to use.  You can check the ph level with a test strip if you wish.  Between 8.5 and 10 is the goal.


Free Oatmeal, Honey, Shea Butter, Avocado Oil, Blender Soap Recipes

Welcome to another one of our free soap recipe pages. This page features some rather exotic and complicated recipes made with oatmeal, shea butter and mango butter, avocado oil, sunflower oil, shea butter, macadamia oil and more. This page also contains a couple of very simple soap formulas that I am sure you will love. The free soap recipes on this site are 16 ounces which is perfect for a blender batch of soap. Like all of our recipes these can be doubled, tripled or quadrupled and can be made using the cold process method in bigger containers than a blender.  You can also alter the formulas or create your own using our Soap-Calc Spreadsheet Program.  We hope you enjoy both the complicated and simple soap recipes on this page. For instructions refer to the instructions on the left. We cover standard cold process and blender soap making methods.  If you prefer video soap making lessons you can Click Here. Also, if you like soap making then you may also want to consider making your own Spa Products as well.

Recipes:

Oatmeal Soap
8 ounces palm oil
4 oz coconut oil
4 oz sunflower oil
1/4 cup regular oatmeal (blend before adding)
2.3 ounces lye
8 ounces distilled or rain water

Blend oatmeal and sunflower oil separately. Mix lye/water solution with Palm and Coconut oil and blend to a trace. Add oatmeal/oil blend and continue.

Simple Soap
16 ounces of vegetable shortening (Crisco)
2 0unces of lye (sodium hydroxide)
6 ounces rain or distilled water

Oat Flour and Honey Soap
6 oz Avocado oil
4 oz Coconut oil
6 oz Olive oil
2 oz Palm oil
2.6 oz Sodium Hydroxide (Lye)
7.2 oz Rain or Distilled Water

At trace:
1 Teaspoon Honey
2 Tablespoons Whole oat flour
3/4 Teaspoon Honey Almond FO

Easy Oatmeal Bar
8 ounces of Palm Oil
6 ounces of Coconut oil
2 ounces olive oil
1/3 cup oatmeal well blended
2.4 oz Sodium Hydroxide (lye)
6.4 oz water

Hawaiian Soap
Ingredients:
13 Oz. Lard
3.2 Oz. Soybean oil
6.4 Oz. Water
2.1 Oz. Sodium Hydroxide (Lye)

At trace, add:
1/2 ounce kukui nut oil
1/2 ounce macadamia nut oil
1 Teaspoon castor oil
1/2 ounce shea butter
1/2 ounce mango butter
1 Tablespoons coriander EO
1 Tablespoons tumeric (for color)

Vegetable Soap
10 Ounces Olive Oil
4 Ounces Coconut Oil
4 Ounces Crisco
2.5 Ounces Lye
7.2 Ounces Soft Water

Free Gentle Vegetable Oil (vegetarian) Blender Soap Making Recipes Formula

Collection of Free Olive Oil Based Soap Recipes or Formulas.

Welcome to our free cold process or blender soap recipes / formula page. On this page you will find olive oil, coconut oil, palm oil and other vegetable oil based soap recipes. These soap recipes are sized at 16 ounces so they can be made in a blender or the standard cold process way. If you wish to make larger batches you can double or triple the recipe. If you use a larger batch you can still use a stick blender to speed up the process. If you wish to alter the formula more I would recommend you purchase our Soap-Calc Spreadsheet and run your oils through that program to calculate exact lye amounts. If you prefer video soap making lessons you can Click Here. Also, if you like soap making then you may also want to consider making your own Spa Products as well.

Recipes:

Exotic Cinnamon and Orange Vegetable Based Oil Soap
6 ounces of coconut oil
3 oz. palm oil
7 oz. olive oil
2.35 oz. lye
6.4 oz. water
.25 oz. orange essential oil
.25 oz. cinnamon essential oil

Carmelized Palm Milk Based Soap
16 ounces palm oil
2.5 ounces Lye (sodium hydroxide)
10 ounces whole milk

Soothing Beeswax Soap
14 ounces non virgin olive oil
1 ounces plain beeswax
1.5 ounces palm oil
2 ounces of lye (sodium hydroxide
6 ounces water

Gentle Soap for Faces
16 ounces pure (non virgin) olive oil*
2.1 ounces Lye (Sodium Hydroxide)
6.4 ounces of Water

*non virgin olive oil is better for soap

Buying or Making your Soap Molds

More about MOLDS : You can use almost anything glass, stainless steel or plastic as a soap mold. You can use a wooden box lined with saran wrap, a pvc pipe capped on one end or candy molds. A PVC pipe makes a neat mold. All you do is spray the inside with PAM and then pour the soap solution into the pipe,let it set, and then uncap and push the soap out of the mold. You then can cut it into round pieces. Wooden molds lined with wax paper work well also. Wood soap molds can be taken apart easily to remove the soap. Then the soap is sliced and aged.

Making Your First Batch of Cold Process Soap – How to Make Soap

Once you have assembled your tools and ingredients you are ready to make your first batch of natural lye soap.  At this point you need to have a simple recipe picked out. You will also need the oils that the recipe requires.  You should also have your work area set up and your lye purchased and present. Follow all safety procedures for working with lye.  Wear goggles and gloves.

Making Soap from Scratch at Home

Step One – Prepare your molds. Molds can be anything from a greased pan to capped pvc pipes. If you want small hand soaps you can use candy molds. To make a loaf of soap you can make a wooden mold and line it with plastic. Then you would slice it after it cured. For molds, plastic, glass or stainless steel is recommended. Place your molds on a flat, level surface and grease them with an oil like PAM. Make sure you have enough capacity to accommodate all of your soap mix.  If you have extra soap mixture and no place to put it then it would go to waste.

Step Two – Measure out your water and lye. Use a postal or digital scale for weight. Remember to zero out the scale with your empty container on it so you get the weight of the lye and water only. Once you have the exact amounts, dissolve the lye in cold water (Do not use an aluminum container. Use stainless steel, enamel coated steel or a heat resistant glass container like Pyrex). Do NOT pour water into the lye. Pour the lye slowly into the water just a little at a time. Stir until the lye is dissolved and let the solution cool. The water will become very HOT in a matter of seconds after stirring in the lye. This is normal. Now, allow the lye/water solution to cool to around 110 degrees. At this point it will be clear.

Step Three – Measure, Mix and Melt the oils and fats and let them cool gradually to around 110 degrees. The heating is mainly done to melt fats that are in solid form like lard. If your oils are already in liquid form such as canola oil or corn oil just heat them up to around 110 degrees. Check to make sure that the container you are using to heat the oil is is large enough to hold the oil plus the lye solution with enough room left over for stirring without splashing the solution everywhere. If you would like, you can use a separate container for mixing the oil and lye together. If you do this simply pour the warmed oil into this container prior to step 4.

Step Four – Carefully pour the lye solution into the now 110 degree oil/fat solution. Pour in a steady, slow stream and stir slowly and constantly. Do not to splatter the solution onto yourself or others. Continue stirring. Depending upon the types of oils you are using the lye oil solution will begin to thicken or trace in 15 minutes to 3 hours. To trace means that the solution has thickened and if you drizzle some from the spoon it creates a trace on the surface. If you are using a slow trace recipe you can stir for a few minutes and then let the solution sit for 10-15 minutes and then repeat this process until a trace appears. If you used the proper amount of lye it will eventually trace or thicken.

Step Five – When the solution begins to thicken you can add any fragrance oils or essential oils as well as any other additives such as oatmeal, pumice, coffee, herbs that your recipe calls for. Stir these ingredients into the soap and mix thoroughly. The reason these are added at trace and not before is to keep the lye from destroying them.

Step Six – Carefully pour this mixture into your molds. Your mold should be greased or sprayed with PAM.  This will help the bars to release. After you pour the traced soap into your mold you should cover it with a towel to prevent the soap from cooling to fast. The mixture will stay warm for a while. Keeping it in a warm dry place and covered will help the soap to cure faster and more efficiently. This will help give you the best possible result from your batch.

Step Seven – Let the soap harden for a day or two and then pop it out of the mold, cut it and let it age for about 3 – 6 weeks before using it. You can do a ph test and when it is at 8.5 – 10 it is ready.

TIP – You can purchase soap colorants from a soap supply company or you can use crayons that are made with stearic acid (most are). To use crayons melt a small piece and add it at the trace stage. We also have soap supplies available below.

The Chemistry Behind Soapmaking / How is soap made?

Soap is a byproduct of a chemical reaction that takes place between oils or fats and sodium hydroxide or lye. When mixed with water and then with oils or fats a process called saponification takes place. The initial saponification process takes anywhere from 20 – 90 minutes. After the soap mixture is poured into a mold the rest of the saponification takes place and can take from 5 – 6 weeks. Once the soap has cured it can be tested for proper ph levels using a test strip. You are looking for a ph level of 8 – 10.5.

Each oil has a different SAP value which determines the amount of lye it will take to convert that oil into soap. If you mix oils you will need to calculate a blended SAP value. Programs like our Soap-Calc spreadsheet can help you do this.

Basic Ingredients That You Will Need for Soapmaking

Ingredients that you will Need to Make Soap

Oil and/or Fats – Almost any natural oil or animal fat can converted into soap using lye. Each has its own special characteristics and creates different properties in the soap that it becomes.  Some popular oils are coconut oil, canola oil, olive oil, vegetable shortening, palm oil, bacon grease, and lard. Note – We have more information about the different type of oils and their properties at the following link.

100% Lye (NaOH) Sodium Hydroxide – Lye is the chemical that converts oil or fats to soap. Before it was readily available it was extracted from ashes left over from a fire.  Red Devil lye is a popular brand.  We have a link below with sources of lye if you have problems finding it locally.

Water – Distilled water or bottled water is preferable. The minerals in hard tap water are not needed for soapmaking and can cause problems.  Pure distilled water is all you need.

Essential Oils and Fragrances- These can be added but are not required. They add a nice fragrance to your soap which most people prefer. Stay away from any scents that contain alcohol since it can adversely affect a formula and cause unwanted results.  Also, avoid potpourri, candle scent oils and commercial perfumes. These ingredients are not made for soap and can cause problems. Essential oils and fragrance oils are fine to use and are commonly available at health food stores. They are generally used for aroma therapy.

Other additives – Oatmeal, spices, ground up pumice, sage, ground apricots, herbs and other ingredients can also be added to soap at the trace stage to add texture, fragrance or function.

Soap Colorants – These can be purchase from a soap supply store or you can use crayons that are made using stearic acid (common) If you use crayons melt a piece first and add it to the soap mix at the trace stage. It is best to use commercially available colors.  In other words, use colors that are designed to be used in soap.

Equipment and Tools that you will need

First, let me say that you can get almost everything you need to make soap at Walmart or a Grocery Store.  You can also buy soapmaking supplies online. This goes for equipment and tools also.  Here are the basic supplies that you will need.

-A Pair of safety goggles and a long sleeve shirt or coveralls. (Important)
-A Pair of rubber gloves or dish washing gloves to protect your hands from lye. (Important)
-Two 1/2 gallon Rubbermaid type pitchers that are dishwasher safe. One will be used for water and the other for lye.
-Some durable plastic stirring spoons. One will be for oils and one will be for lye/water mix.
-Glass candy thermometers for check the temperature of your oil and soap mix. (do not use aluminum)
-Large enameled or stainless pot to melt oils in.  A 16 quart pot should work fine. Avoid using aluminum pots.
-Old blankets for insulating the soap when it is in the molds.
-Kitchen food scale or postal type scale.
-Saran type food wrap to be used to line molds)
-A collection of molds.  Different shapes and types.
-Stick Blender is optional (creates a faster trace)

For making blender soap you will also need:

-Standard Kitchen type Blender with a lid
-Towel to cover the blender when it is in operation.

Free Olive and Coconut Oil Blender Soap Recipes / Formulas

Collection of Free Olive Oil Based Soap Recipes or Formulas.

Welcome to our free cold process or blender soap recipes / formula page. On this page you will find olive oil, coconut oil, lard, and palm oil soap recipes. The soap recipes on this page are sized at 16 ounces so they can be made in a blender. If you wish to make larger batches you can switch to the standard cold process method and double or triple the recipe. If you wish to alter the formula more I recommend you purchase our Soap-Calc Spreadsheet and run your variations through that program to calculate exact lye amounts. If you prefer video soap making lessons you can Click Here. Also, if you like soap making then you may also want to consider making your own Spa Products as well.

Recipes:

All Vegetable Oil Soap (will lather well)
6 ounces coconut oil
3 oounces palm
7 ounces regular non virgin olive oil
2.35 oz. lye (sodium hydroxide)
6.4 ounces water

Vegetable Free Soap
6 ounces of Olive Oil (does not need to be virgin oil)
10 ounces of Lard
2.1 ounces of Lye
6.4 ounces of Water
.16 ounce Soap Fragrance if desired (available below)

Rich Lathering Soap
4 ounces of Olive Oil (does not need to be virgin oil)
4 ounces of Coconut Oil (provides a nice lather)
8 ounces of Lard
2.27 ounces of Lye
7 ounces of Water
.16 ounce of Soap Fragrance if desired (available below)

Super Rich Lather Soap
5.5 oz. of Coconut Oil (provides lather)
10.5 oz. of Palm Oil (provides lather)
2.37 oz. of Lye
6.4 oz. of Water
.16 oz. of Soap Fragrance (available below)

Luxury Body Bar
5.3 ounces of vegetable oil or olive oil
10.7 ounces of tallow
1 ounce cocoa butter (for moisture – add at trace)
2.1 ounces of lye (sodium hydroxide)
6.4 ounces cold water

Safely Working with Lye (Sodium Hydroxide)

Safely working with lye

If you are going to make soap at home you are going to have to deal with lye. Lye is also known as sodium hydroxide and is the key ingredient in soap. It is the chemical that converts the oils and fats. Lye is one of the key ingredients in drain openers such as “Drano” or “Liquid Plumber” because of its amazing ability to convert greasy buildup into a soluble substance and clearing a clogged line. Lye should be handled in the same way that drain cleaner, bleach, gasoline or pool chemicals would be handled. If mishandled it can be a dangerous chemical and can cause harm to you and others. If handled correctly these kinds of problems can be avoided. There is no reason why accidents involving lye cannot be completely avoided. As with all dangerous chemicals, keep them away from children.

You can substantially reduce your chances of ever having an accident with lye by remembering four simple things.
1. Never pour water into lye. Always pour lye into the water. (slowly) If you pour water onto lye it can cause a violent reaction.
2. Secondly, be careful not to splash or spill the lye solution. Pre-plan every move you make. Don’t use containers that spill easily. Use stable ones. Stir slowly. Keep other people away while you are working.
3. When handling lye wear goggles, rubber gloves and long sleeves. This will protect you in the event some lye splashes onto you.
4. Keep water near by to wash off any lye that may get on you.
5. Keep lye out of the reach of children.

Please read the following safety information regarding lye.

Warning: Keep children and animals away from lye (sodium hydroxide). Lye is very caustic and can cause serious injury or even death if swallowed and can cause blindness if splashed into the eyes. Always wear long sleeves and be sure to always wear safety goggles. Always keep a large cup of fresh water nearby. If you should splash some lye or raw soap into your eye, IMMEDIATELY pour large amounts of cool water into your eye continuously for 10 minutes, or longer. Visit your nearest hospital emergency room or call 911. If you should splash lye or raw soap onto your skin, rinse immediately with cool water. For more serious skin burns, seek medical care immediately. If lye is accidentally swallowed, do not induce vomiting, call your poison control center or 911 for further instructions, get to emergency fast. It is important to have your lye containers labeled. Again, keep lye away from children and when working with lye keep children away from your work area.